01
Direct answer
We Buy New and Used Electrical Switchgear
For a purchasing inquiry, provide the manufacturer and assembly identifier, the ratings you can read, photos showing the offered sections, and the equipment's location and known condition. Tell us whether you are offering the entire assembly or only identified sections. Acceptance of any particular assembly is reviewed case by case; a recognizable brand or clear photograph does not guarantee an offer.
You do not need to resolve every technical question before contacting us. Mark unavailable information as unknown and explain which labels or records you have. That is more useful than assigning a model from appearance or copying a rating from a similar unit online.
02
Keep photography separate from electrical work
Use only existing exterior labels and photographs taken from authorized, safe locations. Do not open electrical compartments, remove covers, rack breakers, operate controls or perform tests to complete this checklist. If a requested detail is inaccessible, send existing documentation instead. Qualified personnel handle any inspection requiring access, electrical isolation and removal.
A dark indicator, an OPEN marking or a report that the building is unused does not establish that equipment is safe to access. OSHA's electrical work-practice rule addresses qualified-person verification and requires equipment without the specified safeguards to be treated as energized. Your purchase inquiry is not an electrical safety assessment. [3]
03
Photograph the assembly identity before component labels
Look for an externally accessible equipment rating plate that identifies the assembly. Photograph the whole plate, including its heading, manufacturer, type or series, serial number, order number and date if shown. Not every plate contains all these fields. Add one wider photo showing where that plate sits on the offered equipment so the identifier can be associated with the correct section.
Keep the assembly plate separate from breaker, relay, meter and site asset labels. A facility tag may connect the gear to drawings, but it is not a manufacturer model number. Likewise, a breaker nameplate identifies that component rather than proving the entire lineup's identity. Eaton publishes separate assembly and breaker nameplate examples, and Schneider explicitly identifies the front Type VR nameplate as a circuit breaker rating plate. [1] [2] [4]
04
Capture complete ratings, not isolated numbers
Preserve the wording beside each value: voltage, amperes, frequency, short-circuit or withstand information, and enclosure designation where stated. Keep any voltage-dependent rating rows and time qualifications in the image. If you transcribe a field, include its units and label rather than sending a number such as 1200 or 50 by itself.
Do not substitute a breaker frame rating for an assembly bus rating, or describe a bus withstand rating as a breaker interrupting rating. These identify different capabilities. Eaton's breaker example separately identifies frame size in amperes and interrupting capacity. Photograph a visible trip-unit or rating-plug identifier separately rather than assuming it equals the frame size. Record switchgear, switchboard, metal-clad or metal-enclosed wording exactly as documented; do not choose a classification from the cabinet's appearance. [4]
05
Use manufacturer examples as label-reading references
Eaton's Magnum DS assembly manual includes a typical blank assembly rating nameplate in Figure 1. Its separate Magnum breaker manual annotates a typical MDS nameplate: the family name and designation identify the breaker family; frame size identifies amperes; interrupting capacity is another field; and accessory information describes factory-equipped features. Use these annotations to organize your own photos, not to fill in missing values. [1] [4]
Schneider's Masterclad 27 kV bulletin describes drawout metal-clad switchgear using vacuum circuit breakers and identifies Type VR breaker labeling separately. It also explains that assemblies are customer-specific. A Type VR label therefore belongs in the component photos alongside assembly records, not as a substitute for them. These manufacturer examples are identification references only, not guaranteed purchases, available inventory, an OEM relationship or a parts-interchangeability claim. [2]
06
Make each exterior photo answer a question
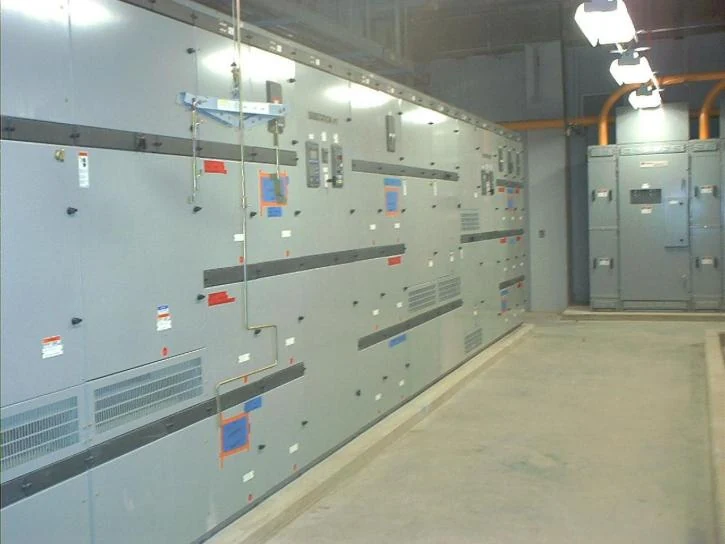
Include a full front view showing the offered lineup's boundaries. If it is too wide for one readable image, provide overlapping views in left-to-right order. Add close views of exterior section numbers, main or feeder labels, and visible breaker or control-device identifiers where safely accessible. Pair each close-up with enough context to show which section it belongs to.
Show visible dents, corrosion, damaged doors or packaging concerns rather than cropping them out. Preserve original photos; provide a tighter copy if small text is difficult to read. Avoid glare and check that characters remain legible when enlarged. Do not describe concealed components as present merely because a door label names them. Explain whether a photograph is current or comes from an earlier installation or storage record.
07
Use existing drawings to fill documentation gaps
Send available front elevations, one-line diagrams, section schedules and equipment lists with their drawing numbers and revision dates. Schneider lists front elevations, floor plans, one-lines, control schematics and wiring diagrams among the customer drawings furnished for Masterclad assemblies. These records can connect labels to a particular configuration without requiring new internal photographs. [2]
Identify the pages covering the offered gear and disclose any known changes after the drawings were issued. Existing commissioning, maintenance or storage records can supplement identification, but they do not prove current condition. If records disagree with a photographed plate, send both and flag the conflict. Do not alter a drawing or guess which record is correct.
08
Send one organized purchasing inquiry
Text photos to (951) 733-6603 or email electricalsurplusbuyers@gmail.com. Include your contact information, city and state, assembly identifiers, offered section count, known new or used status, and whether the gear is installed or already removed. State what accessories and records are included and identify known missing items.
Label files by assembly and section, such as Assembly-A_front and Assembly-A_section-2_plate. Add a short note separating observed condition from unverified information. If several identifiers appear, describe where each was found. Nationwide opportunities are reviewed case by case, and any purchasing terms depend on the particular equipment and agreed transaction.